
Print Center
Print Center is where you tell ThermalPrint about your printer. You usually set it up once. The same printer, media, and options are then used by both Import & Convert and the Label Designer.

Printer and media#
ThermalPrint prints through CUPS, the standard Linux printing system, using its command-line tools. If your printer works in other Linux programs, it works here. Add the printer first in your desktop's printer settings.
| Setting | What it means |
|---|---|
| Printer queue | The printers your system knows. The line below shows a best-effort hint such as Likely thermal label printer. It is based on the name and media, and is a hint only. |
| Printer media size | The paper size the printer driver offers. Choose the one that matches your loaded labels, such as 4 × 6 in. A Custom dimensions choice appears if the driver supports it. |
| Advanced driver resolution | An optional resolution choice if the printer offers one. Leave it on Driver default unless you have a reason. |
| Refresh printers | Looks for printers again after you add or turn on a printer. |
Why media matters. The media tells the printer driver how big the label is, so it does not shrink, rotate, or add margins. If the output size and the printer media disagree, ThermalPrint warns you and offers Match output to printer media.
Output settings#
| Setting | What it does |
|---|---|
| Copies | How many of each label to print (1 to 999). |
| Rendering DPI | The sharpness the label is drawn at: 203 (typical for 4 × 6 printers), 300, or 600. Use your printer's real resolution. |
| Output label size | Presets (4 × 6 in, 4 × 4 in, 2 × 1 in, 100 × 150 mm) or your own Width and Height in millimeters. |
| Swap portrait / landscape | Exchanges width and height. |
Label stock and queue#
The Label stock card draws your label's shape and size, with DPI, copies, and the printer media. The Queue & diagnostics card shows:
- A status notice that says what to do next: Add a label, Review the crop, Choose a printer, Choose printer media, Label size differs from printer media, Verify the loaded stock, or Ready to submit.
- How many imported labels are queued, with Open import queue to jump there.
- Check CUPS job status: asks CUPS what is waiting. A message that a job was accepted means the scheduler took it, not that the printer produced a label. Look at the printer.
Alignment and printer profiles#
Each printer remembers its own settings#
If you use more than one printer, such as a 4 × 6 shipping printer and a small price-tag printer, ThermalPrint remembers the media, resolution, DPI, label size, copies, and alignment separately for each. Switch printers in Printer queue and the right settings come back automatically. A printer you have never used starts clean. No "save" button is needed.
Safe margin for a printer that clips its edges#
Under Alignment, Safe margin sets how far designs should stay from the label's edge, from 0 to 10 mm. It is remembered for each printer. In the Label Designer, the canvas shades that border and names any object inside it, even when the printer's driver reports no unprintable border. See Safe margin.
Fixing a printer that prints off-center#
Some printers feed labels a little to one side, so the content is shifted or the edge is cut off. The alignment offset moves everything by a small amount to correct this.
- Print the test label. Press Print alignment test. It prints a ruler label with a thin border 1 mm in from every edge, a cross at the center, and tick marks every 5 mm.
- Measure. On a correctly aligned label the border is the same distance from each edge. Measure how far it is shifted.
- Enter the correction. Set Horizontal and Vertical in millimeters (positive moves content right and down, negative moves it left and up). The range is −10 to +10 mm.
- Print the test again and adjust until the border is even.
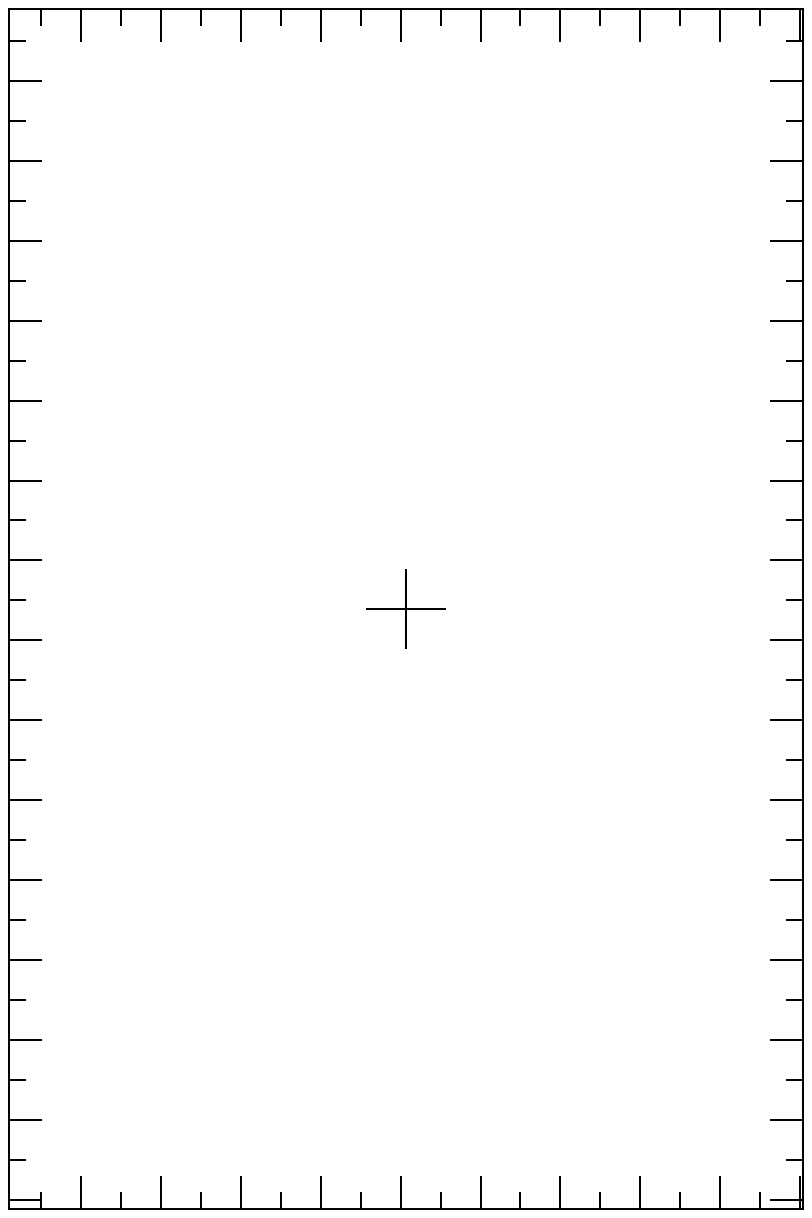
Reset offset sets both values back to zero. The offset applies to printed labels only; exported PDF, PNG, SVG, and ZPL files are never shifted. It also does not apply to raw ZPL printing.
If the whole image is too small or the edges are cut off by the same amount all around, the cause is usually the media size, not alignment. Check that the printer media matches your labels first.
Recent prints#
Batch runs and number ranges are recorded once, with the count in the title, for example Customer label · batch of 50 or Shelf tag · numbers 20; reopening one opens the original design, not a single numbered label.
Each label you print is added to Recent prints at the bottom of Print Center, with the date and time, printer, and copies. It shows your last ten prints (the app keeps up to 50).
- Press Open to bring the label back. A design reopens in the Label Designer as an unsaved copy exactly as it was printed; an imported label returns to the queue in Import & Convert.
- Nothing prints when you press Open. You review the label, then press Print yourself.
- If the original file has been moved or deleted, you are told to add it again.
- Clear history removes the list.
A batch print is listed once, as Design name · batch of N. See Folder watching and history for more.